|
In this article: Integration setup: |
Overview
Omnidesk is a customer support and ticket management system. It allows you to track and analyze user requests, includes ticket creation, task management, integration with other tools and analytics to optimize support services.
Once the integration is set up, new reviews in the app stores will start converting to tickets in Omnidesk. All the available information about reviews, including review history and tags from Asodesk, will appear in Omnidesk.
When your employee responds to a review, it is published on an app store on behalf of the app developer through Asodesk.
Asodesk interface
-
Go to Integrations settings in Asodesk. Click on 'Connect Omnidesk account'.

2. Select the app you want to link to Omnidesk and click 'Next':

3. Set up filters for each app:
-
Filter out reviews that you want to get:
-
all
-
became better (only reviews with the improved rating)
-
became worse (only reviews with the decreased rating)
-
updated (all reviews that were changed)
-
-
Choose how many reviews without developer reply you want to import (up to 100 reviews) or (none)
-
Choose the star rating for the reviews you want to get.
-
Select the countries (for the App Store) and languages (for Google Play) from which you would like to receive reviews.
-
Select the review length you want to get:
-
all
-
less than 3 words
-
more than 3 words
-
Don't use the review length filter for reviews from Asian countries.
You can also turn off tags if you don't want them to be added to reviews in Omnidesk.

4. If you haven't already, connect your App Store Connect or Google Play Console account to all the apps you selected.
You can set up store integrations later after integrating Omnidesk.
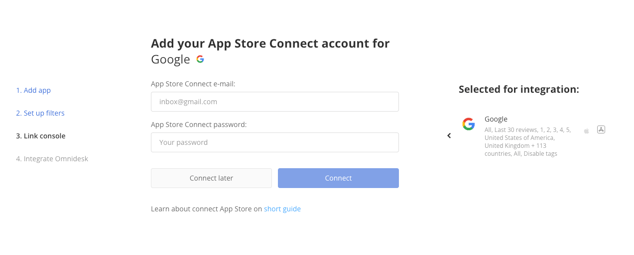
If you don't link a store console, you'll still get user reviews sent to Omnidesk based on the filters you've chosen. But you won't be able to reply to reviews.
5. Add data from Omnidesk. You will find detailed instructions on how and where to access the data in the following steps.

Omnidesk interface
To connect Asodesk with Omnidesk, you will need to set up the following data:
-
API Key
- Go to the 'Settings' and click on the 'API' link on the left;
- Next, you need to create a key:

c. Copy the key and paste it in the Asodesk interface.
2. Subdomain
This is the unique text value that you can find in the URL path to access your Omnidesk panel.
Example:
if the path is https://company.omnidesk.ru/, then the subdomain will be 'company'.
Copy the subdomain and paste it in the Asodesk interface.
3. Administrator's email address
It is very important to provide the email address of the main administrator. This makes sure that our system has all the necessary permissions to Omnidesk tools and the integration functions work smoothly.
Copy the email and paste it in the Asodesk interface.
4. Custom channel
This channel lets Asodesk synchronize your responses from Asodesk to your users on the App Store or Google Play.
-
- To create a custom channel, go to the 'Channels' page in the admin panel and click 'Custom channels' in the left menu.
- Next, click on the 'Add custom channel' button. This will open a form where you can enter the following information:
-
-
-
Name, icon and color at your choice. This name and icon will help you identify which reviews come from Asodesk.
-
Webhook url: paste https://hq.asodesk.com/omnidesk/api/hooks/pull/
-
Default group at your choice.
-
Channel type at your choice.
-
-
d. After filling in the fields, click the "Create channel" button.
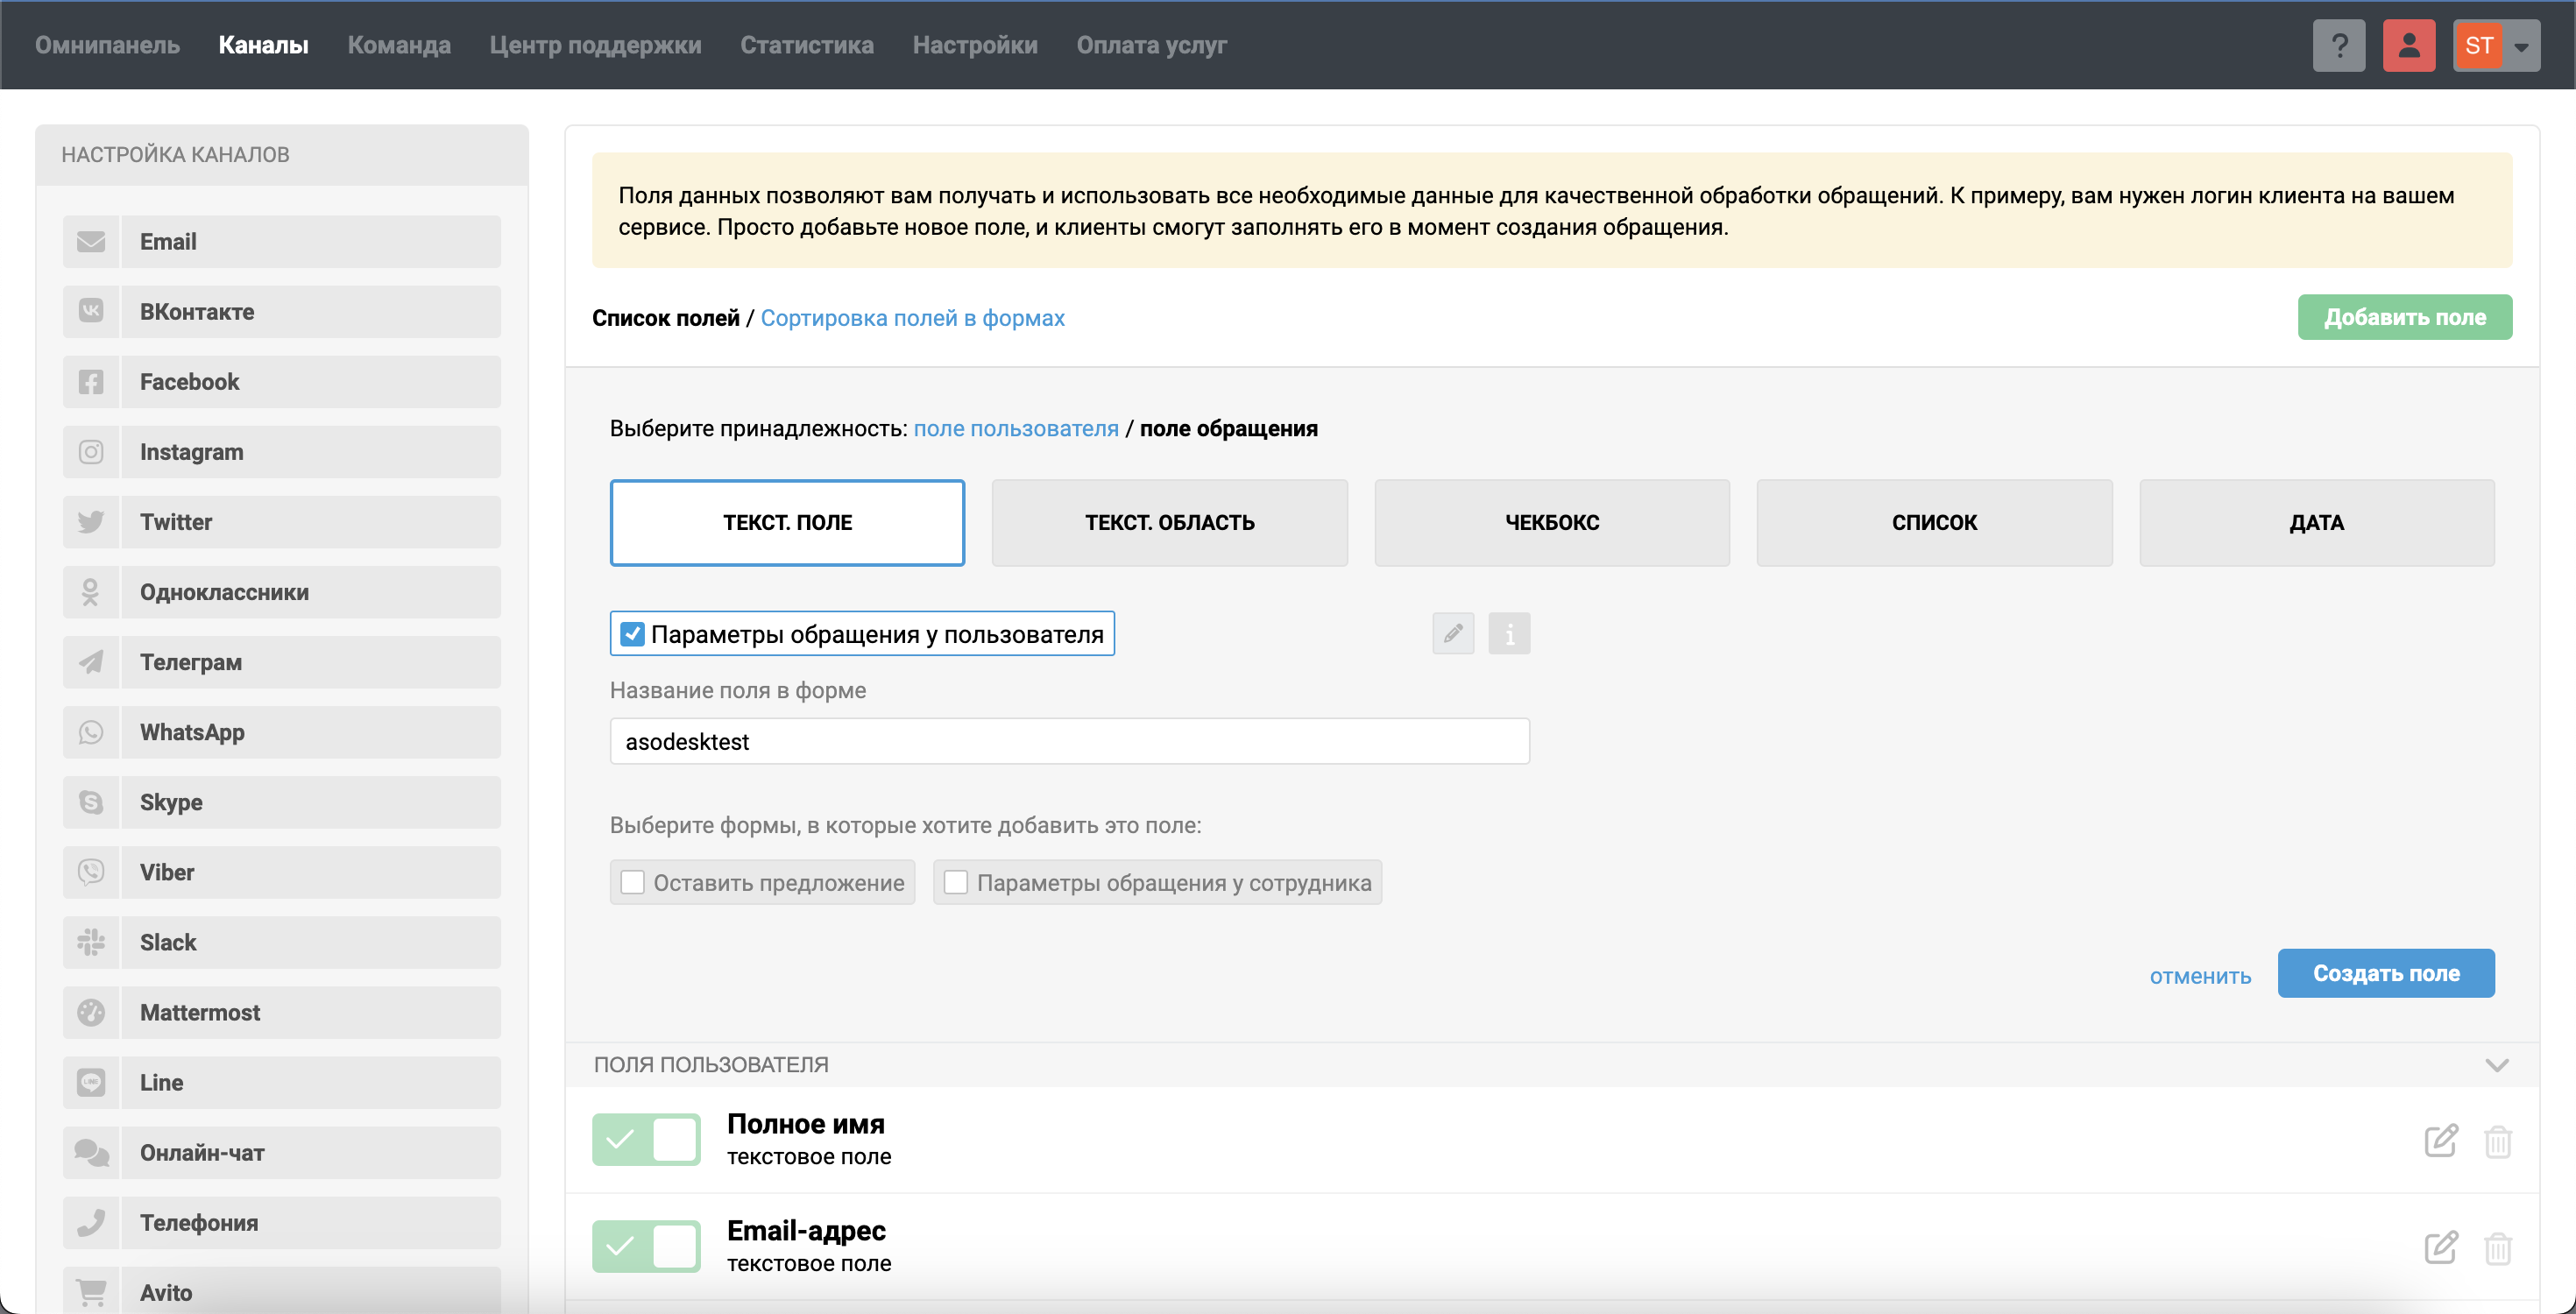
e. You will also need to create a custom query field.
Go to 'Customer Query Management' ➡ 'Data fields' and add a field.
Parameters must be 'Query Field' and 'Text Field'.
The 'Field name' should match your custom channel name.
Important!
Make sure that the right data fields were created. Go to 'Customer Query Management' ➡ 'Data fields'. Look for a box 'Text field' with a name that matches your custom channel name.
You should have both 'Customer Field' and 'Query Field' after completing this step ('Customer Field' is created automatically).
Once the channel has been created, make sure to save all the data that you have copied to Asodesk.

Your connection with Omnidesk is setup!
You can now find your integration settings in the Integrations section. If you want to change it or add any missing information, you can edit the settings by clicking the "Edit" button.
Don't worry if you haven't finished the integration yet. You can go back to it later, and all the changes you've made will still be saved.
Important information
1. There may be a delay between the time a user submits a review of an app and the time the review appears in an app store. This is because the app stores moderate reviews. On Google Play, there is a 24-hour delay. On the App Store, there can be a delay of up to three days.
Once the review is moderated and published in the app store, Asodesk will fetch the review. A ticket will then be created in Omnidesk for it.
2. Because of how the app stores work, it usually takes about 1 hour from sending a response to the review to publishing it on the App Store or Google Play.
3. On Google Play, reviews can be no longer than 350 characters. We have limited the ability to send messages that are longer than this.
Need help understanding our products or services? Have a question? Let us know!
Click the support icon in the bottom right corner or write on hello@asodesk.com